How to Machine Knocking a Cricket Bat in 5 Simple Steps
The best method for getting your cricket bat ready is to machine knock it in, which will strengthen it against every blow. To stabilize the hitting area and avoid cracks, cricket bat banging is essential, regardless of the type of bat—Kashmiri or English willow.
To achieve perfection, producers employ an innovative cricket bat-knocking machine, which is the pinnacle of technology. But hold on! Is the cricket bat on the pitch because the machine is banging loudly enough? You’re in the proper place if this is a question that’s on your mind as well.
We have crafted a detailed guide to answer all of your questions related to machine knocking in a cricket bat. Also, this guide will give you an expanded view of whether your bat needs hand knocking after machine knocking or not.
So, let’s get started!
What is a Machine Knocking in a Cricket Bat?
Knocking, as the term implies, refers to repeatedly hitting or tapping an object or surface. Similarly, knocking in a cricket bat represents a steady tapping of the hitting area from shoulder to toe.
It is a thorough process in which we prepare English or Kashmir Willow bats to withstand leather ball throws and strokes. If you’re playing with plastic or tennis balls, you don’t need to knock your cricket bat.
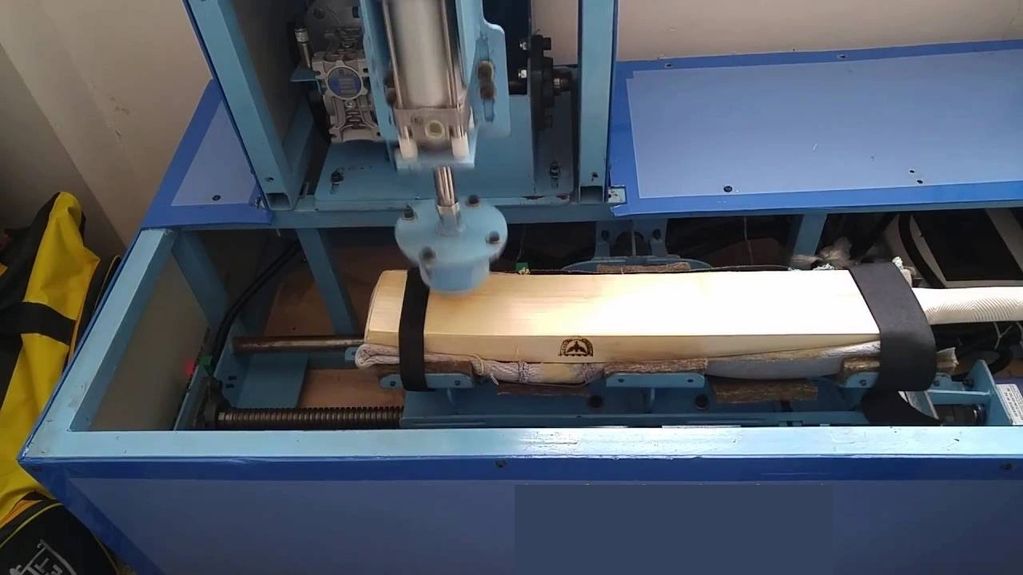
In most circumstances, traditional knocking with a wooden cricket mallet is deemed ideal. However, creative manufacturers such as Heega Sports use high-tech cricket bat knocking equipment to ensure your cricket bat is knocked to perfection.
Do not worry! Our cricket bat knocking process combines machine and traditional banging, symbolizing high quality requirements.
How does a Cricket Bat Knocking Machine work?
A cricket bat knocking machine makes the knocking procedure more convenient and accurate. A step-by-step technique for machine knocking will give you a good concept of how it works. You asked for a process, so here it is!
Oiling and rubbing:
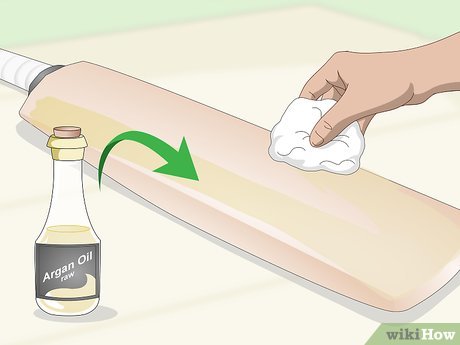
Like conventional knocking, the method begins with adding raw linseed oil to the bat’s surface. The oil keeps the willow wood wet and prevents cracks during compression. After that, we use a soft towel to evenly distribute the oil on the bat before putting it in the machine.
The waxed bat is stored for approximately 24 hours to allow the wood fibers to absorb the oil and withstand precision machine hammering.

Placing the bat:
Now that the bat is ready to be knocked, it’s time to place it in the cricket bat knocking machine. According to the arrangement, we place the cricket bat in the machine with the hitting area facing upwards.
To avoid damage, we ensure that the machine properly holds the bat without overpressing it.
Setting knock count:
As previously stated, a cricket knocking bat machine has high-tech requirements for easy knocking. It allows you to set the knock count, including vertical and horizontal knocks, based on your requirements.
In most circumstances, 2000-5000 knocks are deemed suitable for professional cricket bats while facing leather balls. However, your bat can take up to 20,000 knocks to prepare for the match.
Adjust knock density:
Aside from the knock count, the machine knocking process in cricket bats also involves altering the density. The knock density controls the intensity and speed of the hammer as it hits the bat’s surface. Thus, proper knocking requires adjusting the density based on knock counts.
Fortunately, cricket bat knocking devices allow you to control the knock density and assure consistent hits on the bat’s surface.
Finalizing:
Without a doubt, robotic knocking provides consistent knocks and is far more convenient than traditional banging. However, the machine merely knocks on the bat’s front face, ignoring vital portions like the corners and toes.
To achieve the desired results, we recommend completing the bat using a hand knocking or classic cricket bat knocking technique.
Traditional Cricket Bat Knocking Process:
Oiling:
Whether conventional or machine knocking, the technique always begins with linseed oil on the bat. The recommended amount of linseed oil is one teaspoon or 4-5ml, as too much oil degrades wood quality, while too little oil may not provide the necessary moisture.
We also propose using raw linseed oil instead of fried oil. Cooked oil can have a negative affect on willow fibers and can soak up moisture.
Rubbing with Soft Rag:
Surprisingly, the second step of hand knocking is identical to the machine cricket bat knocking method. Rubbing with a soft rag gives the bat an even coat of oil and flattens the knocking surface.
We applied linseed oil to the surface and toe of the bat, leaving no patches or oil pools behind for an even finish.
Use Mallet to Knock Bat:
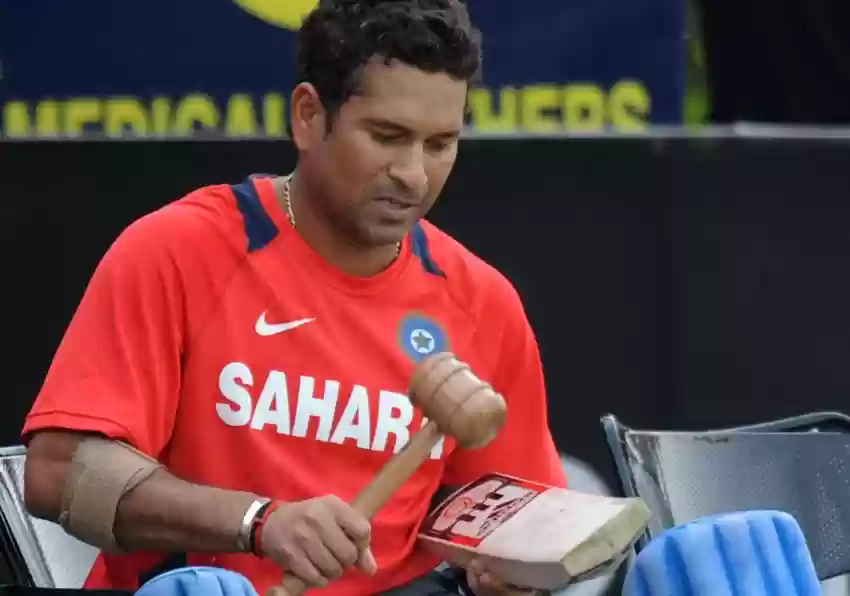
After you’ve finished oiling and rubbing, it’s time to practice the most vital component of hand-knocking. Use a hardwood or cricket mallet to knock off undercooked portions or regions left over from machine knocking.
If you’re building the bat from scratch, you should also concentrate on the primary hitting region, which may require up to 20000 manual knocks. Let’s look at three essential knocking locations that deserve your attention during knocking!
Knocking Areas to Focus On:
Long Edges:
Long edges refer to a bat’s side edges, which impact its overall longevity throughout matches. Instead of hitting the mallet directly at 90 degrees, strike the long edges at 45 degrees. It will knock and round up the edges without reducing the hitting surface of your bat.
Toe:
Knocking the cricket bat’s toe is always vital, even if you have previously utilized a cricket bat knocking machine. Before hitting the mallet on the toe, use a table cramp to ensure a secure hold. Use the full face of the mallet to flatten and round the toe corners for further compression.
Striking Area:
The striking region, or major hitting area, demands maximal hits and may withstand up to 20,000 knocks. Mallet hitting, soft pitch practice, and swing back and forth hitting are some of the tactics for knocking the striking area.
Knock the Striking Area:
Besides these, the best practice of knocking the striking area is to place the bat on a table with a clamp. Compress the striking area using a hardwood mallet unless the striking surface becomes even. Well, it’s just the beginning!
You must knock the striking area around 15000 to 20000 times. Because it is a lengthy process that could take up to 6 hours, you should schedule a 10-15-minute break after each hour. Also, keep examining the wood as you knock, and knock the bat until it is totally hardened.

Conclusion:
Looking at both processes, you may get an idea about the most frequently asked question, “is machine knocking enough?” The answer is NO! Machine knocking is not enough if you’re looking to play with a leather ball on the pitch.
As previously discussed, a cricket bat knocking machine can be useful for accurately knocking the hitting area. However, it does not address other important parts of your bat, such as the toe, edges, and shoulders. That is why we believe a hybrid cricket bat knocking technique that incorporates both machine and hand banging is perfect.
If you want to know more about knocking on a cricket bat, you can consult the professionals of Heega Sports for detailed information.

